
Here I will guide you through safely updating your WordPress website to the latest version, which is important to do not only for security but for performance and search too.
Whenever I’m asked by my clients to carry out any work on their websites, if I haven’t recently worked on the site I always do a backup first. This includes backing up all the website files, database and an xml file of all the content. Its piece of mind for me to know that if anything goes wrong I always have a fallback. Its also good house keeping to regularly backup your website just in-case the server fails or you have a security breach.
Okay, lets get started, here is a list of the things you will need to begin :
- Your WordPress login details.
- Your website cPanel or web server control panel login details ( ask your web hosting company / ISP if required ).
- Your website FTP login details ( again ask you web hosting company / ISP if required ).
- An FTP client, I use FileZilla, its free to download and use on Mac OS, Windows PC or Linux.
- Your MySQL database login details including phpMyAdmin url if you don’t have cPanel or web server admin login details ( ask your web hosting company / ISP for assistance if required ).
STEP 1 – Login to your WordPress Dashboard

When you login to your WordPress Dashboard you will see a light yellow tinted panel at the top with a message “WordPress ? is available! Please update now.” Before you click update you need to make a backup of your entire website.
STEP 2 – Backup your Database

Login to your web server via cPanel or whatever server admin system your web host company/ISP uses. Scroll down to locate the Databases section and click on the phpMyAdmin icon. If you’re not using cPanel then search the admin system you are using for Databases or MySQL or similar. If you do not have access to your web server ask your ISP / web hosting company for access to your MySQL database via phpMyAdmin. They will need to supply the url, username and password for your database.
If you are unable to get access to your database, for whatever reason, you could try installing a plugin to do the job for you. A WordPress plugin I have used on many sites is WP-DB-Backup, instructions on how to install this plugin can be found here. Another similar, slightly more up to date option is WP-DBManager.
STEP 3 – Select your Database

You will need to select your database to view and export all of its tables. It will be listed in the column on the left of the window. In this example the database we are going to select is named _test and is highlighted in the image above.
STEP 4 – Select all your Database Tables
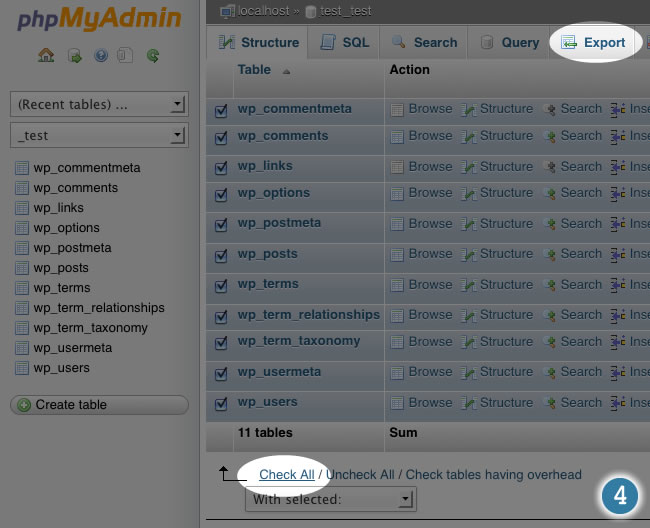
Click Check All to select all the tables in your database and then select Export from the menu at the top of the screen.
STEP 5 – Save your Database
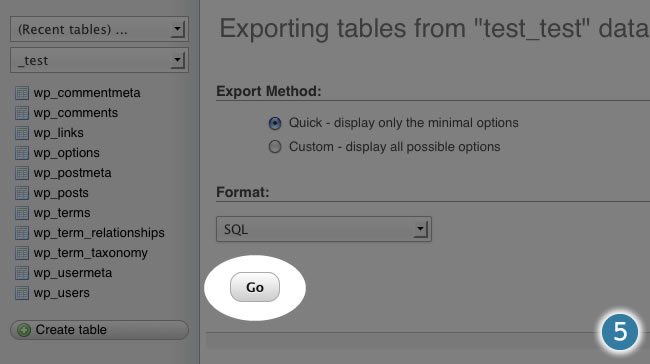
To save a local copy of your database on your computer create a new folder and name it something logical, for example I have named my folder BACKUP130319, ie backup and then todays date. Leave the options as they are and click Go.
STEP 6 – FTP Download all Website Files for Backup
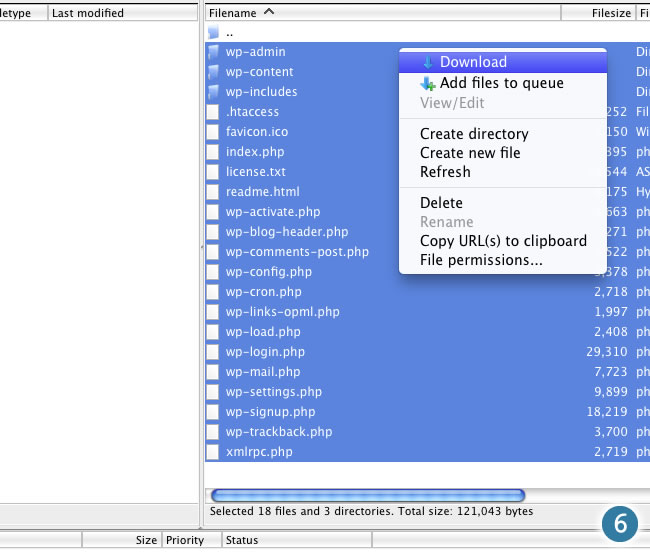
Using your favourite FTP Client or your web hosts file manager you should now download all your website files to your computer. Ideally create a new folder inside BACKUP130319 and name it all-files or something similar. This may take a while depending on the size of your website and your connection to the internet.
STEP 7 – Export all Website Content to and XML file
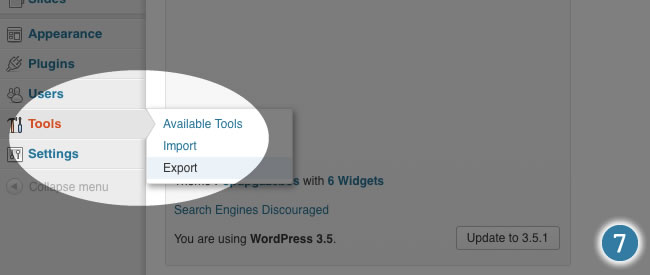
Go to your WordPress Dashboard, scroll drown to Tools and select Export in the popup.
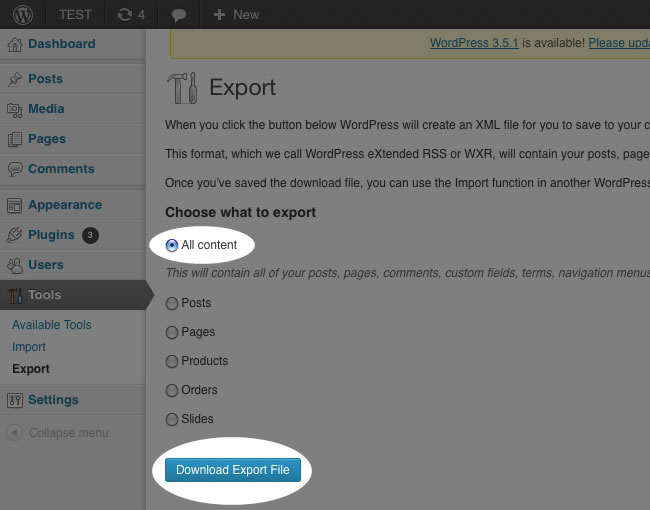
In the Export page, select All content then click Download Export File to save the xml file to the backup folder you created earlier on your computer.
STEP 8 – Update WordPress
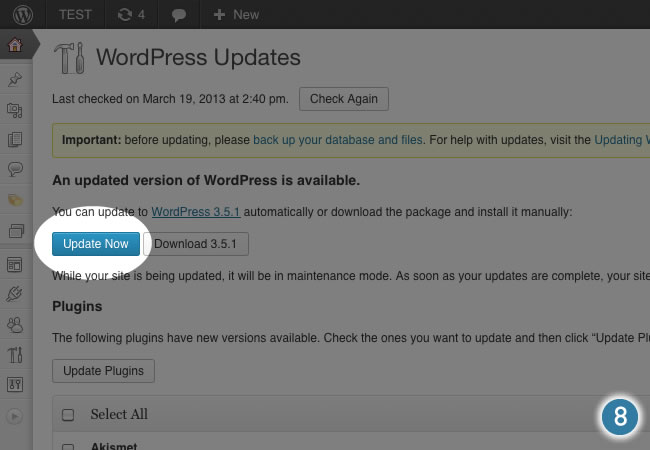
Back in the Dashboard click Please update now to get to the WordPress Updates page. Now click the Update Now button to take you to the Connection screen.
STEP 9 – Input your FTP Details/Credentials
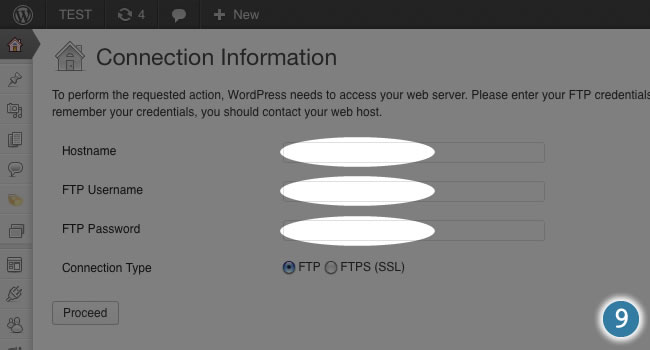
Copy and paste the FTP details you got from your web host / ISP into the relevant boxes as shown above then click proceed.
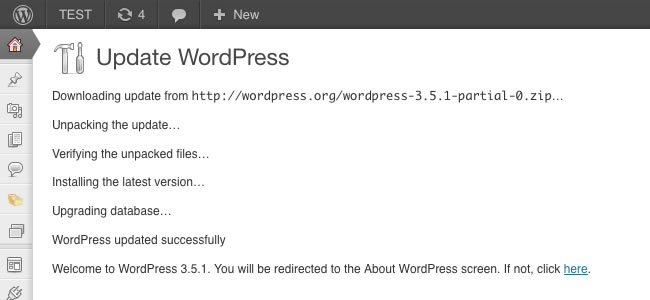
You will see a page of information automatically output during the update process similar to the image above. This should cycle through fairly quickly depending on your server speed.
STEP 10 – Finished!
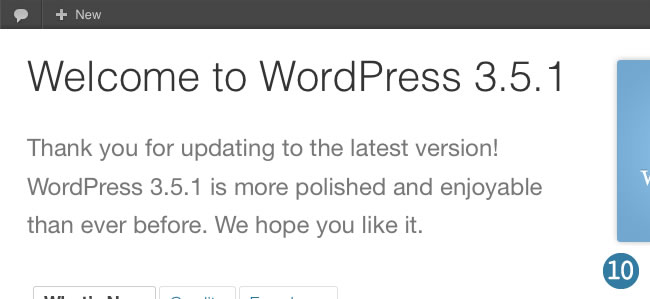
That’s it, you’re done! Providing everything went to plan you should see a screen with a message similar to the one above.